2025
mkdir 2025/
cp -r 2023/* 2025/*
cp -r 2024/* 2025/*mkdir 2025/
cp -r 2023/* 2025/*
cp -r 2024/* 2025/*本文将指引你在Linux下打包ESXi镜像。
以下操作均建议在容器中进行,避免对主工作空间造成影响。
使用Debian 11的LXC容器。
Python 3.7PowerCLI建议使用Python 3.7这个版本,故行之。
# 下载
wget https://www.python.org/ftp/python/3.7.16/Python-3.7.16.tar.xz
tar xvf Python-3.7.16.tar.xz && cd Python-3.7.16
# 预配置
apt install libssl-dev
./configure --enable-optimizations --prefix=/usr/local/python37 --with-ssl-default-suites=python --with-openssl=/usr
# 编译安装
make -j2
make install
# 软连接
ln -s /usr/local/python37/bin/python3.7 /usr/bin/python37
ln -s /usr/local/python37/bin/pip3.7 /usr/bin/pip37
# 实现兼容性
# 否则报不是可执行文件的错误
ln -s /usr/local/python37/bin/python3 /usr/local/python37/bin/python3.exe
# 安装依赖
pip37 install six psutil lxml pyopenssl
PowerShell按微软提供的文档安装。
apt update  && apt install -y curl gnupg apt-transport-https
curl https://packages.microsoft.com/keys/microsoft.asc | apt-key add -
sh -c 'echo "deb [arch=amd64] https://packages.microsoft.com/repos/microsoft-debian-bullseye-prod bullseye main" > /etc/apt/sources.list.d/microsoft.list'
apt update && sudo apt install -y powershell
PowerCLI# 进入 PowerShell
pwsh
# 查找
Find-Module -Name VMware.PowerCLI
# 安装
Install-Module -Name VMware.PowerCLI -Scope AllUsers
# 配置 Python 路径
Set-PowerCLIConfiguration -PythonPath /usr/local/python37/bin/python3.exe
以上步骤完成后,应重启容器,使环境变量生效。
前往https://customerconnect.vmware.com/zh/patch下载最新的bundle(需要登陆)。
前往https://vibsdepot.v-front.de/wiki/index.php/List_of_currently_available_ESXi_packages下载所需驱动。
前往https://github.com/VFrontDe-Org/ESXi-Customizer-PS下载打包用脚本。
# wget ......
wget https://raw.githubusercontent.com/VFrontDe-Org/ESXi-Customizer-PS/master/ESXi-Customizer-PS.ps1
目前较多使用的是ESXi 6.7,也是大部分社区包所支持的最高版本。
常用包如下:
net55-r8168: 提供 Realtek 8168/8111/8411/8118 网卡支持
net-igb: 提供大部分 Intel 网卡 支持
sata-xahci: 为不受官方支持的 SATA AHCI 控制器提供支持(即为一些PCIe转SATA扩展卡提供支持)
# 这里要求写绝对路径
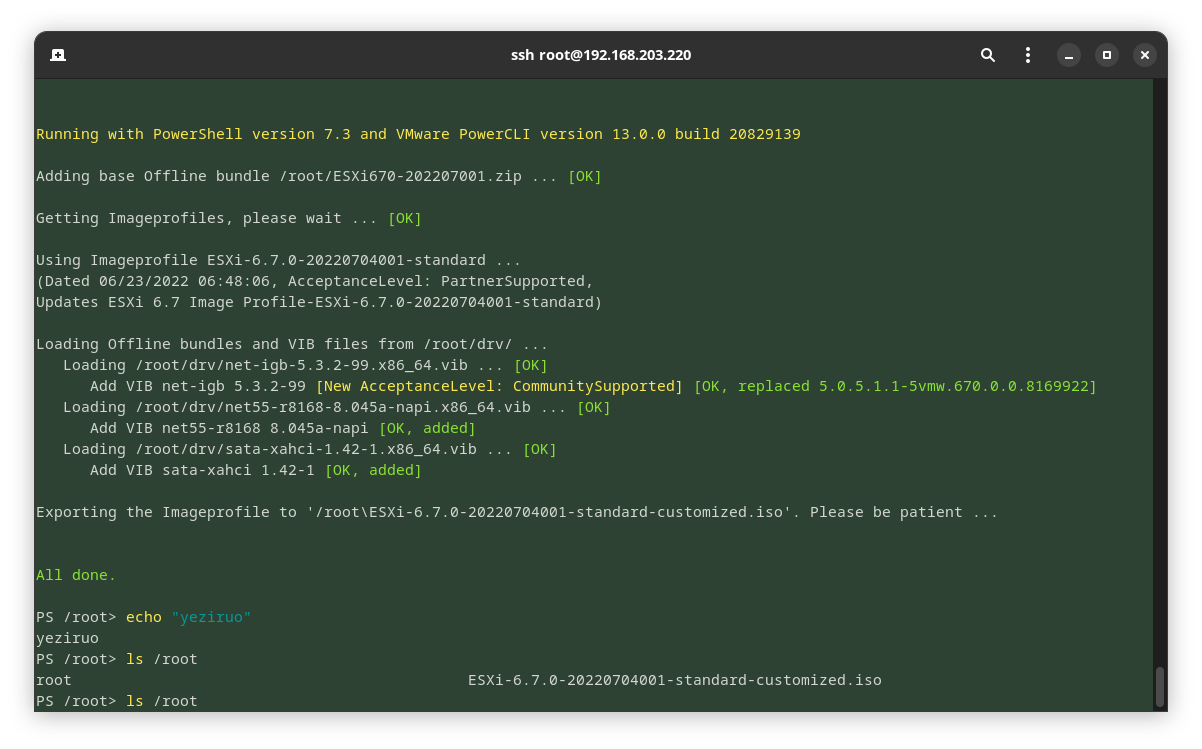
./ESXi-Customizer-PS.ps1 -izip /root/ESXi670-202207001.zip -pkgDir /root/drv/
因为反斜杠的问题,我们的镜像最终输出在根目录下,以root\开头。
https://docs.vmware.com/cn/VMware-vSphere/7.0/com.vmware.esxi.install.doc/GUID-F02D0C2D-B226-4908-9E5C-2E783D41FE2D.html
https://www.v-front.de/p/esxi-customizer-ps.html
https://learn.microsoft.com/zh-cn/powershell/scripting/install/install-debian
mkdir 2023/
cp -r 2022/* 2023/*准确来说是下载根文件系统,这里从清华镜像源下载。
https://mirrors.tuna.tsinghua.edu.cn/lxc-images/

Debian:
https://mirrors.tuna.tsinghua.edu.cn/lxc-images/images/debian/bullseye/amd64/
这里有default和cloud两种选择,cloud镜像稍大,可能包含一些针对云额外配置,选择default就可以了,下载时选择rootfs.tar.xz即可。
下载后解压,默认的镜像root用户没有密码,同时IP也不是固定的,所以我们可以进行预配置:
mkdir lxc_debian
tar xvf rootfs.tar.xz -C lxc_debian

# 设置主机名
sed -i "s/LXC_NAME/your_hostname/" ./lxc_debian/etc/hostname ./lxc_debian/etc/hosts

# 网络配置
cat > ./lxc_debian/etc/systemd/network/eth0.network <<EOF
[Match]
Name=eth0
[Network]
Address=192.168.203.210/24
Gateway=192.168.203.1
DNS=223.5.5.5
DNS=223.6.6.6
EOF

# chroot
sudo chroot lxc_debian
(chroot_env) # passwd
(chroot_env) # exit

# 或者直接修改 /etc/shadow
# password: 0000
root:$y$j9T$2iElAGeU9fyGjzJWcHac01$ieVx2juZRDG8DORlyvuCstq0iI8/EVu9JrmsUmhekC.
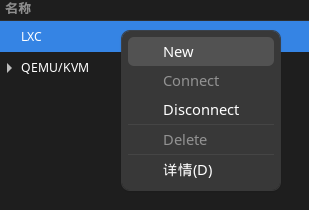
Virt-manager新建LXC连接:
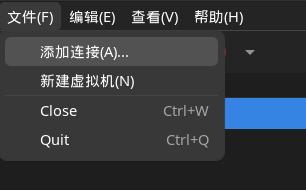
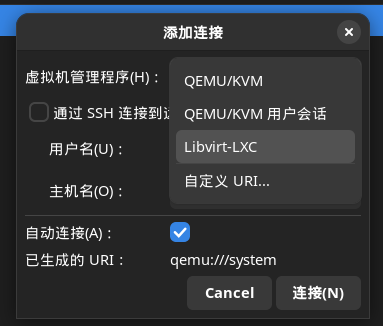
新建容器:
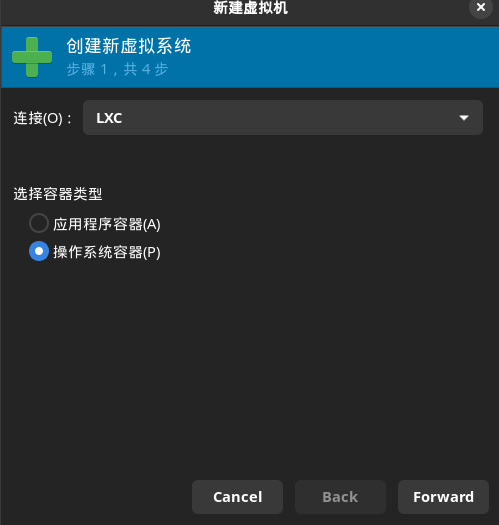
选择Root目录:
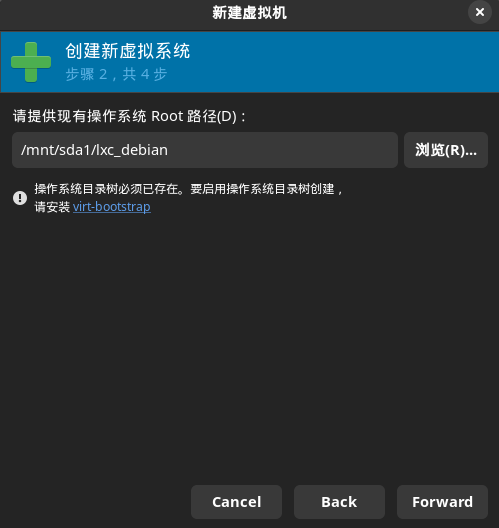
启动:
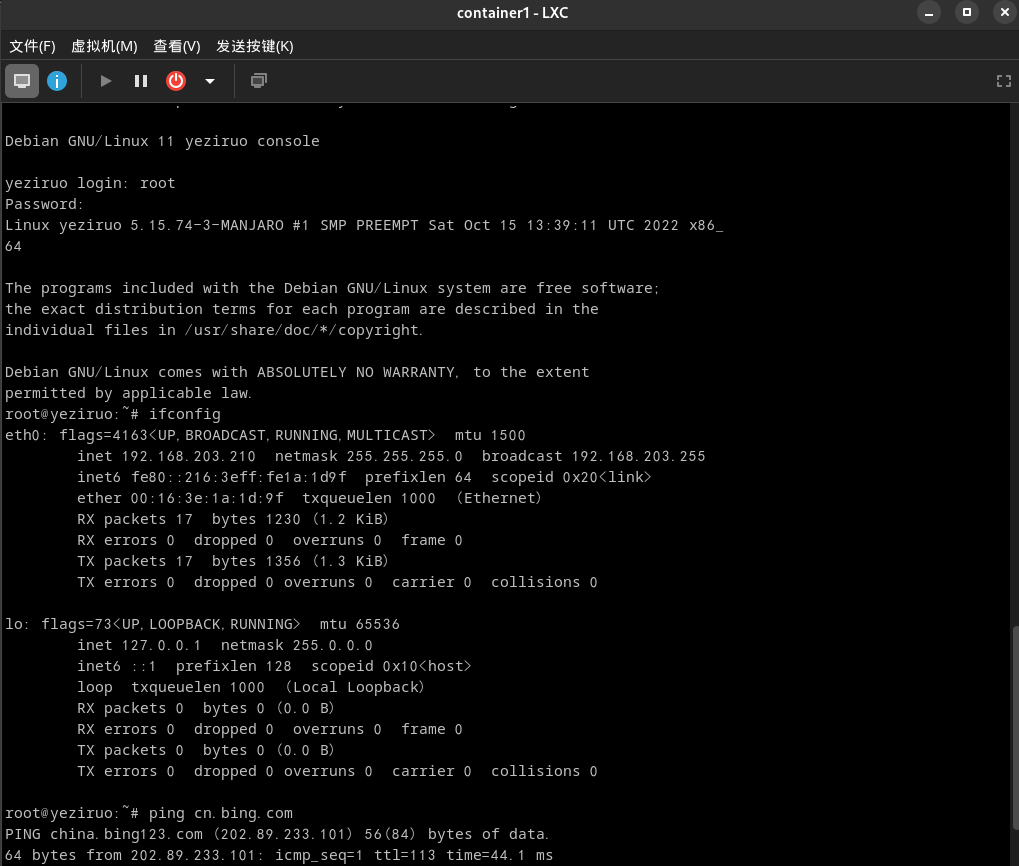
没有前言。
Payload我们可以直接使用golang-jwt中的RegisteredClaims结构:
jwt.RegisteredClaims{
    // 发行人主题
    Issuer:    "",
    // 被签发者主题
    Subject:   "",
    // 用户标识符
    Audience:  nil,
    // 过期时间
    ExpiresAt: nil,
    // 不早于
    NotBefore: nil,
    // 签发时间
    IssuedAt:  nil,
    // JWT的唯一标识符
    ID:        "",
}
此部分参见:https://datatracker.ietf.org/doc/html/rfc7519#section-4.1
或者我们可以自定义一个结构体,只需要引用RegisteredClaims就行:
// 嵌套结构
type CustomInfo struct {
    Name string `json:"name"`
}

// 自定义 payload
type CustomTokenBody struct {
    *jwt.RegisteredClaims
    User CustomInfo `json:"user"`
    Role string
}
JWT选择签署算法:
// HMAC_HS256_HS384_HS512
// RSA_RS256_RS384_RS512
// ECDSA_ES256_ES384_ES512
// EdDSA_Ed25519
signingMethodECSDA := jwt.GetSigningMethod("ES256")
新建JWT并签署Payload:
token := jwt.New(signingMethodECSDA)

// payload
token.Claims = &CustomTokenBody{
    &jwt.RegisteredClaims{
        ExpiresAt: jwt.NewNumericDate(time.Now().Add(time.Minute * 10)),
    },
    CustomInfo{
        Name: "yeziruo",
    },
    "yeziruo",
}
// 使用私钥签署
// key, _ := ecdsa.GenerateKey(elliptic.P256(), rand.Reader)
signedString, err := token.SignedString(key)
if err != nil {
    panic(err)
}
fmt.println(signedString)
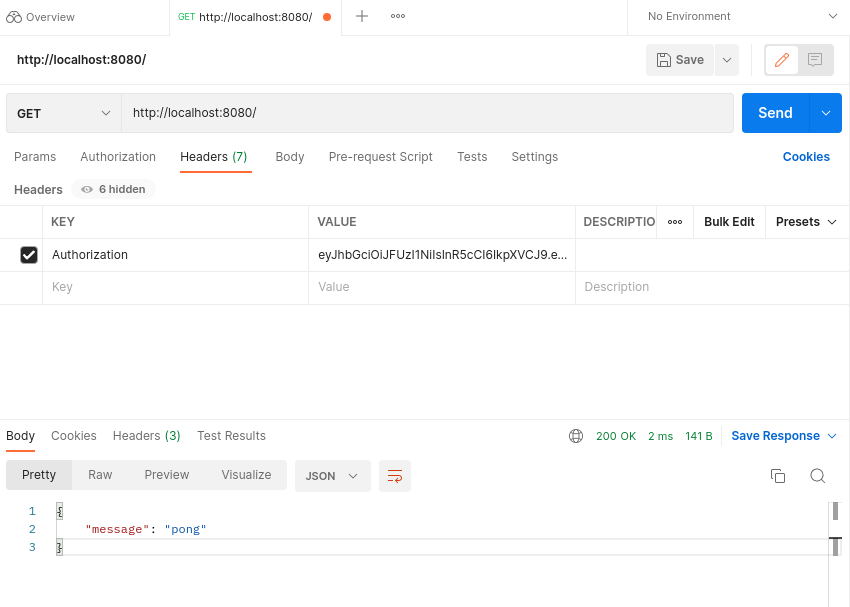
最后生成:
eyJhbGciOiJFUzI1NiIsInR5cCI6IkpXVCJ9.eyJleHAiOjE2NjYxNTk2NjMsInVzZXIiOnsibmFtZSI6InllemlydW8ifSwiUm9sZSI6InllemlydW8ifQ.mCatXHq0ooh49Eusr2aWLJKwwy6K_zogDBVCTc3eBzY_ygePVnFL78QpzkGeuCCyhtjdobuKGx0VxBs6PlYrQA
//payload:{"exp":1666159663,"user":{"name":"yeziruo"},"Role":"yeziruo"}
JWT共有三种解析方法:
// 解析并验证
jwt.Parse
// 仅解析
jwt.ParseUnverified
// 解析并验证
jwt.ParseWithClaims
Parse和ParseWithClaims有一定区别:
// 解析JWT
parse, err := jwt.Parse(signedString, func(token *jwt.Token) (interface{}, error) {
    // 如果你有多个私钥用于签名,那么可以在此通过 kid 来选择相应的密钥
    // 这里获取的 token.Claims 是一个 map
    // 返回公钥
    return key.Public(), nil
})

parse, err = jwt.ParseWithClaims(signedString, &CustomTokenBody{}, func(token *jwt.Token) (interface{}, error) {
    // 这里获取的 token.Claims 会被填充到指定的结构体
    return key.Public(), nil
})

// err 可以返回验证失败原因
// fmt.println(err)
fmt.Println(parse.Valid)
Gin中间件func JWTAuth(priKey *ecdsa.PrivateKey) gin.HandlerFunc {
return func(c *gin.Context) {
token := c.GetHeader("Authorization")
parse, err := jwt.Parse(token, func(token *jwt.Token) (interface{}, error) {
return priKey.Public(), nil
})
if err != nil || !parse.Valid {
msg := "token verification failed"
if err != nil {
msg = err.Error()
}
c.JSON(http.StatusUnauthorized, gin.H{
"code": http.StatusUnauthorized,
"message": msg,
})
c.Abort()
} else {
c.Set("jwt", parse)
c.Next()
}
}
}
https://datatracker.ietf.org/doc/html/rfc7519
https://pkg.go.dev/github.com/golang-jwt/jwt
本文为以下两篇文章的续文:
本文有一些概念涉及前文,故建议阅读后再实践本文章。
csr# "crypto/rand","crypto/rsa"
priKey, err := rsa.GenerateKey(rand.Reader, 2048)
// error_check
pubKey := priKey.Public()
密钥通常使用PEM格式保存,以开头,以结尾,中间是使用Base64编码的内容,为方便下文的操作,封装成一个工具函数:
# "encoding/pem"
func PEMEncoding(key []byte, blockType int) []byte {
    keyType := "PUBLIC KEY"
    if blockType == 1 {
        keyType = "RSA PRIVATE KEY"
    } else if blockType == 2 {
        keyType = "CERTIFICATE REQUEST"
    } else if blockType == 3 {
        keyType = "CERTIFICATE"
    } else if blockType == 4 {
        keyType = "X509 CRL"
    }
    block := &pem.Block{
        Type:  keyType,
        Bytes: key,
    }
    return pem.EncodeToMemory(block)
}
写入文件:
# "crypto/x509"
// 使用 PKCS1 编码密钥
priKeySource := x509.MarshalPKCS1PrivateKey(priKey)
pubKeySource, err := x509.MarshalPKIXPublicKey(pubKey)
// error_check
pubKeySource := x509.MarshalPKCS1PrivateKey(priKey)
_ = os.WriteFile("ca_pri.key", PEMEncoding(priKeySource, 1), 0755)
_ = os.WriteFile("ca_pub.key", PEMEncoding(pubKeySource, 0), 0755)
生成证书请求需要使用x509.CertificateRequest结构体:
# "crypto/x509"
x509.CertificateRequest{
    // 经过 DER 编码的ASN.1信息(包含CSR、签名算法和签名)
    // 读取时自动填充
    Raw:                      nil,
    // 经过 DER 编码的证书请求信息
    RawTBSCertificateRequest: nil,
    // 经过 DER 编码的公钥信息
    RawSubjectPublicKeyInfo:  nil,
    // 经过 DER 编码的主题信息
    RawSubject:               nil,
    // CSR版本
    Version:                  0,
    // 签名
    Signature:                nil,
    // 签名算法
    SignatureAlgorithm:       0,
    // 公钥算法
    PublicKeyAlgorithm:       0,
    // 公钥
    PublicKey:                nil,
    // 主题信息
    Subject:                  pkix.Name{},
    // 已弃用,可被解析的 CSR 信息
    Attributes:               nil,
    // CSR 的扩展信息
    Extensions:               nil,
    // CSR 的原始扩展信息,当这项不为空时将覆盖其他指定的扩展
    // 解析时不会填充
    ExtraExtensions:          nil,
    // 主题备用名称
    DNSNames:                 nil,
    EmailAddresses:           nil,
    IPAddresses:              nil,
    URIs:                     nil,
}
生成请求:
# "crypto/x509","crypto/rand"
caRequest := x509.CertificateRequest{
    Subject: pkix.Name{
        Country:            []string{"CN"},
        Organization:       []string{"blog.yeziruo.com"},
        CommonName:         "Yeziruo Root CA",
    },
}
// 随机数流,CertificateRequest,私钥
csr, err := x509.CreateCertificateRequest(rand.Reader, &caRequest, priKey)
// error_check
_ = os.WriteFile("ca_req.csr", PemEncoding(csr, 2), 0755)
使用x509.ParseCertificateRequest函数来解析CSR文件,返回CertificateRequest对象:
# "crypto/x509"
caRequest, err = x509.ParseCertificateRequest(csr)
// error_check
证书的签发需要使用x509.Certificate结构体,但该结构体参数过多,故只解释本文所使用的:
# "crypto/x509"
x509.Certificate{
    // 颁发者主题
    Issuer:                      pkix.Name{},
    // 被颁发者主题
    Subject:                     pkix.Name{},
    // 不早于
    NotBefore:                   time.Time{},
    // 不晚于
    NotAfter:                    time.Time{},
    // 基础密钥用法
    KeyUsage:                    0,
    // 扩展密钥用法
    ExtKeyUsage:                 nil,
    // 基本约束
    BasicConstraintsValid:       false,
    // 是证书颁发机构
    IsCA:                        false,
    // 证书最大路径,该级 CA 能签发子 CA 的证书链路径深度
    MaxPathLen:                  0,
    // 不允许该 CA 签发子 CA
    MaxPathLenZero:              false,
    // OCSP 响应服务器
    OCSPServer:                  nil,
    // 备用 DNS 名称
    ExcludedDNSDomains:          nil,
    // CRL 分发点
    CRLDistributionPoints:       nil,
}
序列号生成:
# rand2 "math/rand"
// sn := big.NewInt(rand2.Int63())
sn := big.NewInt(rand2.Uint64())
// 序列号不能为默认,也不能为有序序号,必须是一个很大的随机数
// ”序列号熵“问题
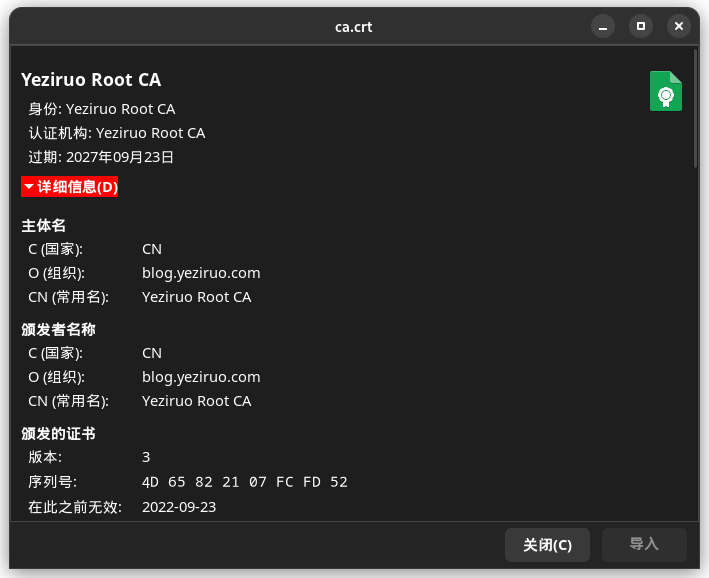
生成根证书:
# "crypto/x509"
ca := x509.Certificate{
    // 从 CSR 中复制主题信息
    Subject: caRequest.Subject,
    // 序列号
    SerialNumber:          sn,
    NotBefore:             time.Now(),
    NotAfter:              time.Now().AddDate(5, 0, 0),
    BasicConstraintsValid: true,
    IsCA:                  true,
    MaxPathLenZero:        true,
    ExtKeyUsage:           []x509.ExtKeyUsage{x509.ExtKeyUsageServerAuth},
    KeyUsage:              x509.KeyUsageDigitalSignature | x509.KeyUsageCRLSign | x509.KeyUsageCertSign,
}

// 随机数流,被颁发者,颁发者,被颁发者公钥,颁发者私钥
// 可以通过这个函数简单的新建子 CA
crt, err := x509.CreateCertificate(rand.Reader, &ca, &ca, pubKey, priKey)
// error_check
_ = os.WriteFile("ca.crt", PEMEncoding(crt, 3), 0755)
同上文所述:
# "crypto/x509","crypto/rand","crypto/rsa",rand2 "math/rand"
cliPriKey, err := rsa.GenerateKey(rand.Reader, 2048)
// error_check
_ = os.WriteFile("cli_pri.key", PEMEncoding(x509.MarshalPKCS1PrivateKey(cliPriKey), 1), 0755)

sn = big.NewInt(rand2.Int63())
cli := x509.Certificate{
    Subject:               pkix.Name{CommonName: "local1.yeziruo.com"},
    DNSNames:              []string{"local1.yeziruo.com", "local2.yeziruo.com"},
    SerialNumber:          sn,
    NotBefore:             time.Now(),
    NotAfter:              time.Now().AddDate(1, 0, 0),
    BasicConstraintsValid: true,
    IsCA:                  false,
    ExtKeyUsage:           []x509.ExtKeyUsage{x509.ExtKeyUsageServerAuth},
    KeyUsage:              x509.KeyUsageDigitalSignature,
    CRLDistributionPoints: []string{"http://192.168.122.250/ca.crl"},
    OCSPServer:            []string{"http://192.168.122.250/"},
}
cliCrt, err := x509.CreateCertificate(rand.Reader, &cli, &ca, cliPriKey.Public(), priKey)
// error_check
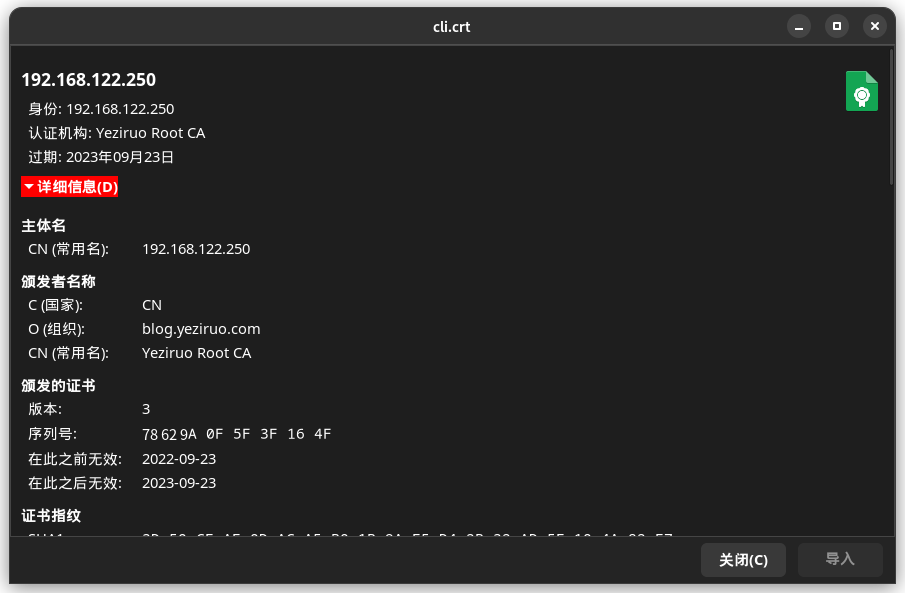
_ = os.WriteFile("cli.crt", PEMEncoding(cliCrt, 3), 0755)
CRL列表// 重新读取证书,让其自动填充一些信息
cca, err := x509.ParseCertificate(crt)
// error_check
revokedObj := pkix.RevokedCertificate{
// 被吊销证书序列号
SerialNumber: cli.SerialNumber,
// 吊销时间
RevocationTime: time.Now(),
}
revokedList := x509.RevocationList{
// 签发者主题信息
Issuer: ca.Subject,
// 被吊销的证书列表
RevokedCertificates: []pkix.RevokedCertificate{revokedObj},
// 一个自增的 CRL 序列号
Number: big.NewInt(1),
// 生成时间
ThisUpdate: time.Time{},
// 下一次更新时间
NextUpdate: time.Time{},
}
list, err := x509.CreateRevocationList(rand.Reader, &revokedList, cca, priKey)
// error_check
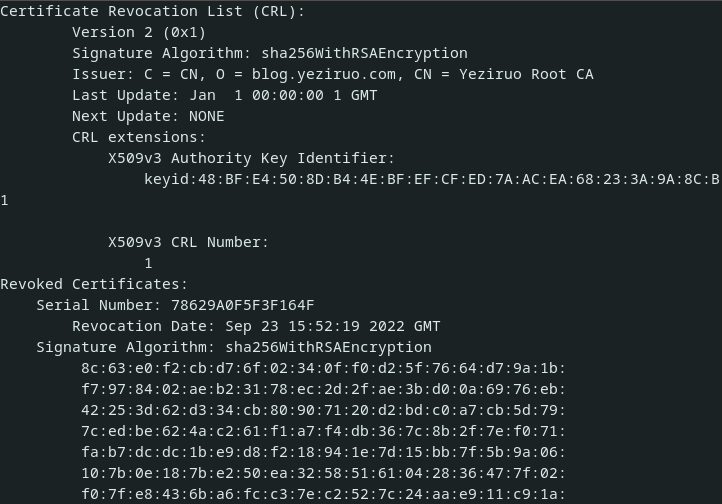
_ = os.WriteFile("ca.crl", PEMEncoding(list, 4), 0755)
OCSP响应服务器OCSP协议使用HTTP承载,同时解析请求需要用到扩展加密库:
package main

import (
    "bytes"
    "crypto/rsa"
    "crypto/x509"
    "encoding/pem"
    "fmt"
    "golang.org/x/crypto/ocsp"
    "net/http"
    "os"
    "time"
)

func main() {
    http.HandleFunc("/", handler)
    fmt.Println("http://localhost:8081/")
    err := http.ListenAndServe("localhost:8081", nil)
    if err != nil {
        panic(err)
    }
}

func loadPriKey(fn string) (*rsa.PrivateKey, error) {
    key, err := os.ReadFile(fn)
    if err != nil {
        return nil, err
    }
    block, _ := pem.Decode(key)
    priKey, err := x509.ParsePKCS1PrivateKey(block.Bytes)
    if err != nil {
        return nil, err
    }
    return priKey, nil
}

func loadCertificate(fn string) (*x509.Certificate, error) {
    key, err := os.ReadFile(fn)
    if err != nil {
        return nil, err
    }
    block, _ := pem.Decode(key)
    crt, err := x509.ParseCertificate(block.Bytes)
    if err != nil {
        return nil, err
    }
    return crt, nil
}

// no nonce ext support
// https://github.com/grimm-co/GOCSP-responder
func handler(w http.ResponseWriter, r *http.Request) {
    ca, err := loadCertificate("ca.crt")
    cli, err := loadCertificate("cli.crt")
    priKry, err := loadPriKey("ca_pri.key")
    if err != nil {
        w.WriteHeader(http.StatusInternalServerError)
        return
    }

    if r.Header.Get("Content-Type") != "application/ocsp-request" && r.Method != "POST" {
        w.WriteHeader(http.StatusBadRequest)
        return
    }
    blob := new(bytes.Buffer)
    _, err = blob.ReadFrom(r.Body)
    if err != nil {
        w.WriteHeader(http.StatusInternalServerError)
        return
    }

    //request, err := ocsp.ParseRequest(blob.Bytes())
    //if err != nil {
    //    return
    //}
    status := ocsp.Response{
        Status:           ocsp.Revoked,
        SerialNumber:     cli.SerialNumber,
        ProducedAt:       cli.NotBefore,
        ThisUpdate:       time.Now(),
        NextUpdate:       time.Now().AddDate(0, 0, 15),
        RevokedAt:        time.Now().AddDate(0, 0, -1),
        RevocationReason: 0,
        // Certificate:      ca,
    }

    response, err := ocsp.CreateResponse(ca, cli, status, priKry)
    if err != nil {
        return
    }
    w.Write(response)
}

https://pkg.go.dev/crypto/x509
准备改过后到机房用,只需要一条USB线就可以用了,还是比较方便的。
详情请参见此链接。

经测试,硬改后还是能接U盘之类的,虽然本身速度就不快。
选中Kernel modules -> USB Support中的kmod-usb-chipidea与kmod-usb-gadget-eth即可。
编译完成后刷写固件,之后通过ssh连接到机器上。
# 开机自动加载驱动
echo -e "modprobe g_ether\nexit 0" > /etc/rc.local
# 将接口划入 LAN
uci set network.lan.ifname="eth0 usb0"
uci commit
使用公对公USB线连接到电脑,在Windows下会被识别为一个串口,请参阅下一小节来解决。

Windows下的驱动问题在OpenWrt Wiki中所述,可以通过指定VID、PID等来解决驱动问题,但没有详细步骤。默认情况下它的硬件ID是USB\VID_0525&PID_A4A2&REV_0409,在Linux下可以直接使用,但在Windows下需要手动安装驱动。
(安全性说明:如果你有相关签名工具,请对驱动进行重新签名)

由于使用STM32F103C8T6进行软实现,没有使用HSM芯片,故存储在EEPROM中的密钥可能会被调试读出,故存在安全风险,只适合把玩,不适合日常使用。
也存在随机数生成不够随机,侧信道攻击(似乎普遍都有这个问题,不过也不是什么事儿)等安全风险。
没有一个硬件密钥是没办法进行相关开发的,而我暂时没有这个又想把玩一下,所以找了下我吃灰的开发板,找到了一块蓝色长条的STM32F103C8T6开发板,检索一番后最终到了这个开源方案,这个方案只支持U2F验证。
https://github.com/gl-sergei/u2f-token
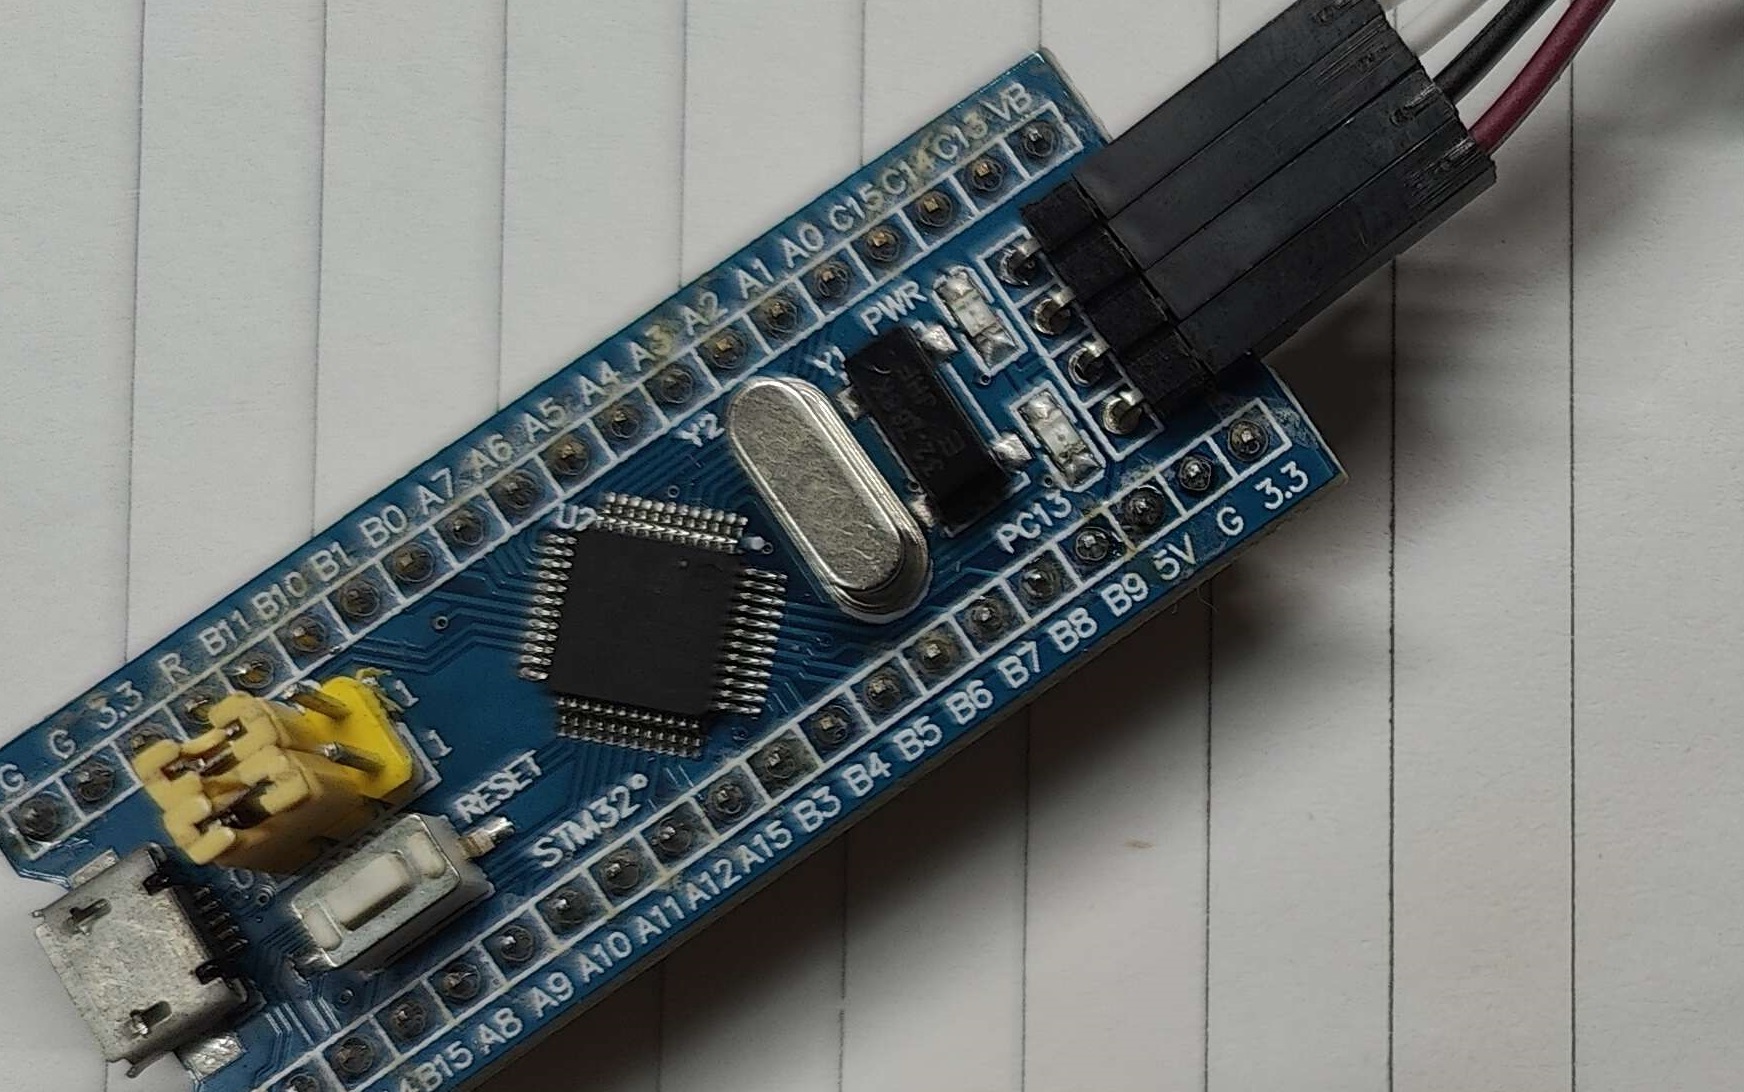
由于仓库提供编译好的固件(BLUE_PILL)会使用复位键作为物理验证按钮,所以我们需要修改一下,在lssues找到了一个修改版本,验证时只需要将PA10下拉就行。
本文会省略一些步骤,详情请见仓库README.md。
git clone https://github.com/Qwertylex/u2f-token
部署交叉编译工具链:
# 原 PPA 老旧已经失效,故我们需要前往 ARM 网站下载
# 前往 https://developer.arm.com/tools-and-software/open-source-software/developer-tools/gnu-toolchain/downloads 下载
wget https://developer.arm.com/-/media/Files/downloads/gnu/11.2-2022.02/binrel/gcc-arm-11.2-2022.02-x86_64-arm-none-eabi.tar.xz
tar xvf gcc-arm-11.2-2022.02-x86_64-arm-none-eabi.tar.xz -C /usr/share
ln -s /usr/share/gcc-arm-11.2-2022.02-x86_64-arm-none-eabi/bin/* /usr/bin/
编译:
# 注意:
# 我们需要将 Makefile 中的 python 替换为 python3
cd u2f-token
git submodule update --init
cd src
make TARGET=BLUE_PILL_PA10BUTTON
# 编译出的固件在 build/u2f.bin
烧写:
使用 STM32 ST-LINK Utility 通过 ST-LINK V2 进行烧写。
设置跳线:
BOOT0 SET 0
BOOT1 SET 1
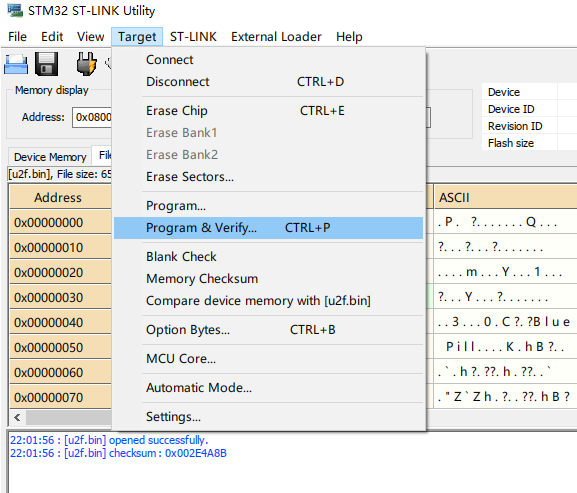
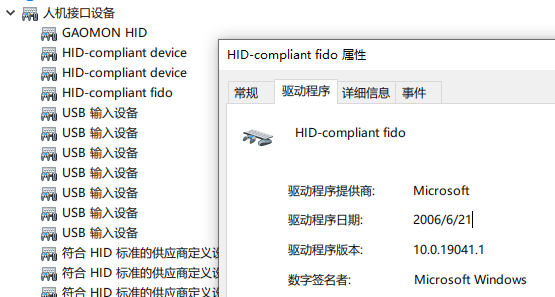
识别:
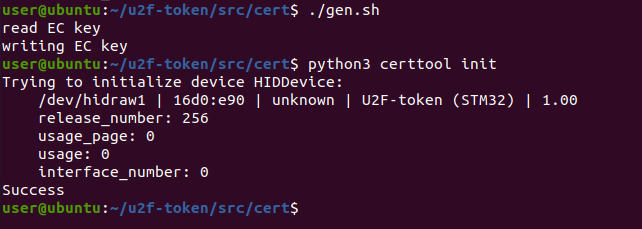
cd ~/u2f-token
pip3 install -r requirements.txt --user
cd src/cert
python3 certtool init
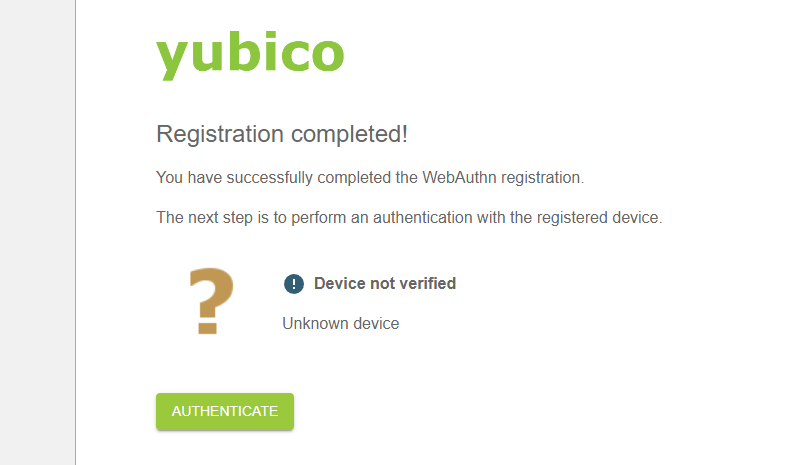
前往https://demo.yubico.com/webauthn-technical/registration进行测试即可。
