Flask框架使用SSL协议
1.安装pyOpenSSL库
pip install pyOpenSSL
(仅pip)
2.修改原有代码
端口改为443,在原有参数上加上ssl_context=('证书路径','私钥路径')即可
app.run(host='0.0.0.0',port=443,ssl_context=('/root/certificate.crt', '/root/private.key'))1.安装pyOpenSSL库
pip install pyOpenSSL
(仅pip)
2.修改原有代码
端口改为443,在原有参数上加上ssl_context=('证书路径','私钥路径')即可
app.run(host='0.0.0.0',port=443,ssl_context=('/root/certificate.crt', '/root/private.key'))1.使用OpenSSL来为自己签发证书
#1 生成私钥
root@one:~/nodejs/CA# openssl genrsa 1024 > /pathway/private.pem
-bash: /pathway/private.pem: No such file or directory
root@orangepione:~/nodejs/CA# openssl genrsa 1024 > private.pem
Generating RSA private key, 1024 bit long modulus
..++++++
...............++++++
e is 65537 (0x10001)
#2 生成签发请求
root@one:~/nodejs/CA# openssl req -new -key private.pem -out csr.csr
You are about to be asked to enter information that will be incorporated
into your certificate request.
What you are about to enter is what is called a Distinguished Name or a DN.
There are quite a few fields but you can leave some blank
For some fields there will be a default value,
If you enter '.', the field will be left blank.
-----
Country Name (2 letter code) [AU]:
State or Province Name (full name) [Some-State]:
Locality Name (eg, city) []:
Organization Name (eg, company) [Internet Widgits Pty Ltd]:
Organizational Unit Name (eg, section) []:
Common Name (e.g. server FQDN or YOUR name) []:192.168.3.199
Email Address []:

Please enter the following 'extra' attributes
to be sent with your certificate request
A challenge password []:
An optional company name []:
#3 提交签发
root@one:~/nodejs/CA# openssl x509 -req -days 365 -in csr.csr -signkey private.pem -out ca.crt
Signature ok
subject=/C=AU/ST=Some-State/L=/O=Internet Widgits Pty Ltd/OU=/CN=192.168.3.199
Getting Private key
2.服务端代码
var https = require('https');//引用https模块
var fs = require('fs');

var options = {
    key: fs.readFileSync('./CA/private.pem'),//私钥
    cert: fs.readFileSync('./CA/ca.crt')//证书
};

https.createServer(options,function(req,res){
    res.writeHead(200);//200响应
    res.end('hello world\n');//发送数据
}).listen(443);//监听默认的https端口
3.效果

由于是自签名证书,所以游览器显示不安全的连接是正常的。
证书是阿里云的免费单域名证书,采用文件验证方式,用DNS有点麻烦。

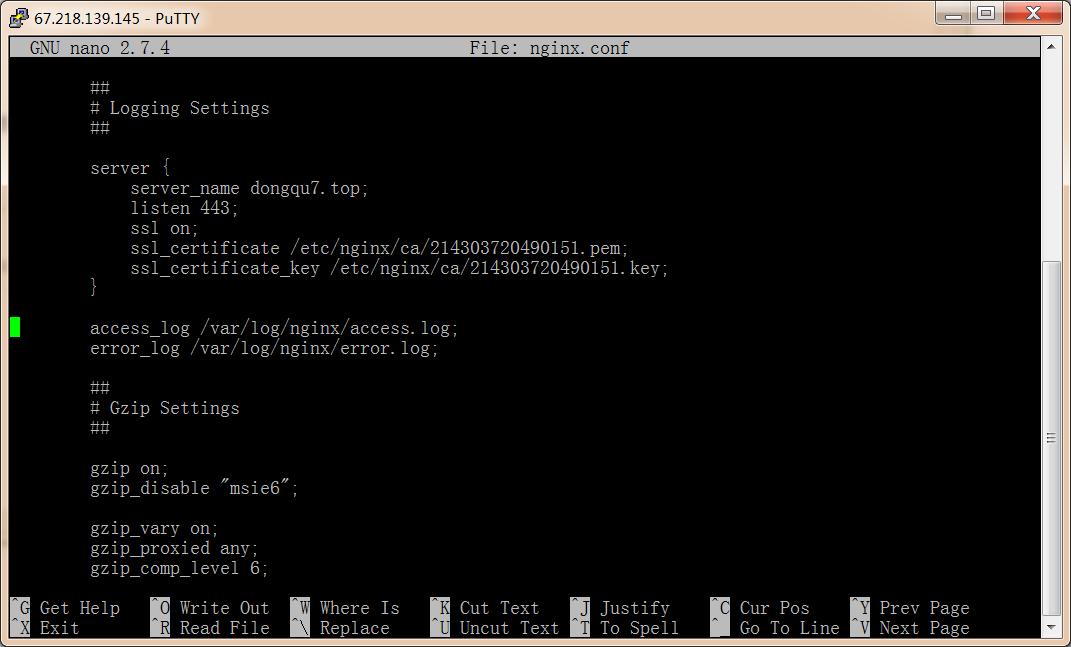
1.切换至Nginx目录,打开nginx.conf配置文件
cd /etc/nginx/sites-enabled/
nano default
(or vim default)
如果你改过,不一定是default

2.在http里添加如下的配置
server {
    server_name 你的域名;
    listen 443;
    ssl on;
    ssl_certificate 证书目录;
    ssl_certificate_key 私匙目录;
}
# Ctrl+O保存 Ctrl+X退出

3.重启,检查是否正常
root@debian:/etc/nginx# nginx -t
nginx: the configuration file /etc/nginx/nginx.conf syntax is ok
nginx: configuration file /etc/nginx/nginx.conf test is successful

root@debian:/etc/nginx# /etc/init.d/nginx restart
[ ok ] Restarting nginx (via systemctl): nginx.service.


