标签 Nodejs 下的文章

就让我来试试传说中最适用于IOT的MQTT协议。

安装

虽然搜索资料很多,但大多是MQTT的使用,尽管有搭建服务器的文章,但我感觉写的不太清楚,大多数文章选择了Mosquitto(也许是Eclipse大厂出品的原因)。
经过寻找,找到了Nodejs写的mosca,但在Pi上老是安装失败,翻了翻Issues,找到了同作者写的依赖性小,轻量化的aedes。

npm install aedes --save


//最小例子
var aedes = require('aedes')();
var server = require('net').createServer(aedes.handle);
server.listen(8266);

简单使用

将所有的订阅与推送保存到sqlite3数据库中:

//Nodejs
var aedes = require('aedes')();
var colors = require('colors');
var server = require('net').createServer(aedes.handle);
var sqlite3 = require('sqlite3').verbose();
var db = new sqlite3.Database('data.db');
var port = 8266;
//更多事件查看Github:https://github.com/mcollina/aedes
aedes.on('publish',function(packet,client) {
    if (client) {
        console.log('[ Publish ] CilentID:'.green,client.id,' Qos:'.green,packet.qos,' Data:[ '.green,String(packet.payload),' ]'.green);
        db.run("INSERT INTO publish (date,client_id,topic,data) VALUES (datetime('now'),?,?,?);",[client.id,packet.topic,String(packet.payload)]);
    }
});
aedes.on('subscribe', function (subscriptions, client) {
    if (client) {
        //subscriptions懒得历遍(一般情况同时只有一个吧)
        db.run("INSERT INTO subscribe (date,client_id,topic) VALUES (datetime('now'),?,?)",[client.id,subscriptions[0].topic]);
        console.log('[ Subscribe ] SubscripTions:'.green,subscriptions[0].topic,' Qos:'.green,subscriptions[0].qos,' CilentID:'.green,client.id);
    }
});
aedes.on('unsubscribe',function(unsubscriptions,client){
    if(client){
        //同理
        console.log('[ unSubscribe ] unSubscripTions:'.green,unsubscriptions[0],' CilentID:'.green,client.id);
        db.run("DELETE FROM subscribe WHERE client_id = ? AND topic = ?;",[client.id,unsubscriptions[0]])
    }
});
server.listen(port,function(){
    console.log('[ Server ] server listening on port'.green,port)
});

//Sqlite3
CREATE TABLE "publish" ( `date` TEXT NOT NULL, `client_id` TEXT NOT NULL, `topic` TEXT NOT NULL, `data` TEXT NOT NULL );
CREATE TABLE "subscribe" ( `date` TEXT NOT NULL, `client_id` TEXT NOT NULL, `topic` TEXT NOT NULL );

//Micropython for ESP8266
>>> from umqtt.simple import MQTTClient                                                                             
>>> conn = MQTTClient('esp8266','192.168.1.64',8266)
>>> conn.connect()
0
>>> conn.publish(b'/test',b'test')
>>> conn.disconnect()

优缺点

  • 轻量化
  • 可以更好的结合业务逻辑
  • 不支持或不完全支持Qos2

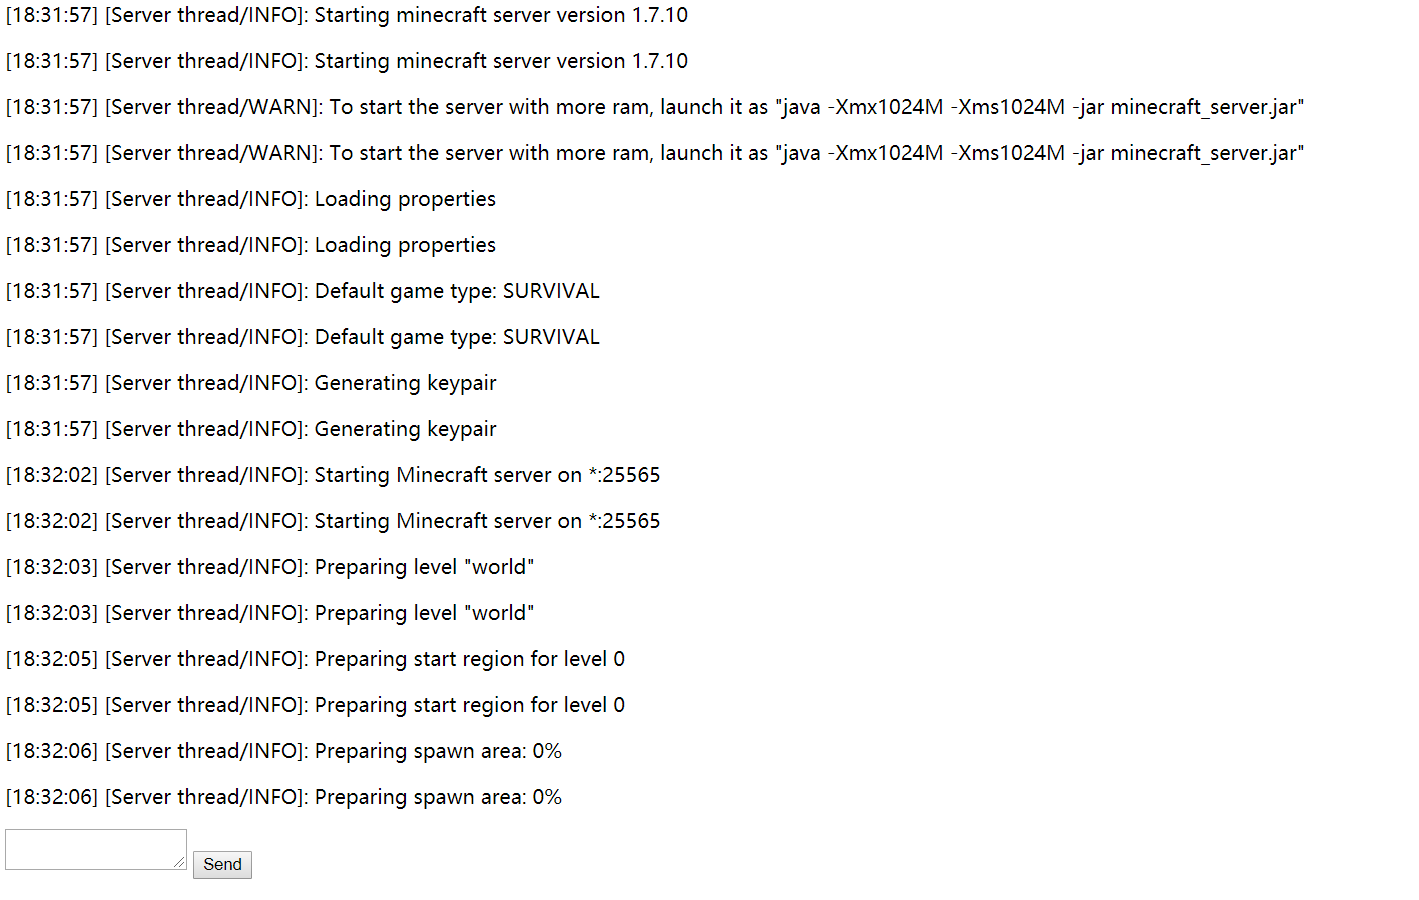
与同学合租服使用的简单工具。

const start_comm = ['-jar','minecraft_server.jar'];
const ws = require('nodejs-websocket');
// exec(),spawn(),fork()
// 参考:https://www.cnblogs.com/chyingp/p/node-learning-guide-child_process.html
const mcprocess = require('child_process').spawn('java',start_comm);
var client = null;
var process = true;
function mcprocess_log(log){
        console.log(String(log));
        if(client){
                client.sendText(String(log));
        }
}
mcprocess.stdout.on('data',mcprocess_log); // 输出/错误事件绑定
mcprocess.stdout.on('data',mcprocess_log);
mcprocess.on('exit',(code) => process = false); // 子进程退出事件
var server = ws.createServer(function(conn){
        client = conn;
        conn.on('text',function(str){ // 消息事件
                console.log(str);
                if(process){
                        conn.sendText(str + '\n');
                        mcprocess.stdin.write(str + '\n');
                }else{
                        conn.sendText('服务器未开启\n');
                }
        });
        conn.on('close',function(code,reason){ // 断开事件
                console.log('客户端断开连接');
                client = null;
        });
}).listen(8080);
console.log('start...');

Html还是和上几篇文章一样:

<title>WebSockets Test</title>
<script src="https://cdn.bootcss.com/jquery/3.4.1/jquery.min.js"></script>
<script type="text/javascript">
var ws = new WebSocket("ws://server_ip:8080/");
ws.onmessage = function(msg){
        $('.message').append("<p>" + msg.data + "</p>");
}
ws.onclose = function(){
        $('.message').append("<p>Connection closed</p>");
}
function sendmsg(){
        var msg = $("#msg").val();
        ws.send(msg);
}
</script>
<div class='message'></div>
<textarea id="msg"></textarea>
<button type="but" onclick="sendmsg()">Send</button>

实际上服务器上使用的是我写的另外一个Python版本的,与Nodejs不同的是我需要新建一个线程去关注服务器核心的输出,所以简单尝试了Nodejs。

71_0.png

用于简单演示JS的AJAX,使用Nodejs做服务端。

1.服务端源码(与这篇文章一样)

var http = require('http');//引用模块
var os = require('os');
var netdev = "wlan0";//网卡名
http.createServer(function (req, res) {
    var net = os.networkInterfaces();
    res.writeHead(200, {'Content-Type': 'application/json'});//Http响应头
    res.write("["+JSON.stringify({//生成json数据
        hostname:os.hostname(),
        platform:os.arch()+"-"+os.platform()+os.release(),
        uptime:os.uptime().toFixed(0),//系统运行时间取整
        load:os.loadavg(),
        totalram:(os.totalmem()/1024).toFixed(0),
        freeram:(os.freemem()/1024).toFixed(0),
    }));
    //网卡信息
    res.end(","+JSON.stringify({//生成json数据
        address:net[netdev][0]["address"],
        family:net[netdev][0]["family"],
        internal:net[netdev][0]["internal"]
    })+"]");
}).listen(80);//监听端口
console.log('Server running at http://192.168.3.184');

2.HTML源码

<script>
function getinfo(){
    http=new XMLHttpRequest(); //AJAX
    http.onreadystatechange=function() {
        if (http.readyState==4){
            if(http.status==200){
                var info = JSON.parse(http.responseText); //转换为JSON对象
                document.getElementById("ram").innerHTML=(info['freeram']/1024).toFixed(0)+'\/'+(info['totalram']/1024).toFixed(0)+"MB";
                document.getElementById("time").innerHTML=(info["uptime"]/60).toFixed(2)+'min';
                setInterval(function(){getinfo();},1500); //定时刷新(1.5s)
        }}}
    http.open("GET","/get",true); //连接
    http.send(null);
}
</script>
<body onload = getinfo()>
    <div align="center" id="l">设备信息</div>
    <div align="center">
        <table width="46%" id="tb">
            <tbody>
                <tr>
                    <th width="33%">设备</th>
                    <th width="34%">值</th>
                    <th width="33%">操作</th>
                </tr>
                <tr bgcolor="#FFFFFF">
                    <td>内存</td>
                    <td id='ram'>ram.value</td>
                    <td><!--<a href="on1"><button type="button1">开启</button></a><a href="off1"><button type="button4">关闭</button></a>-->-</td>
                </tr>
                <tr bgcolor="#FFFFFF">
                    <td>运行时间</td>
                    <td id='time'>time.value</td>
                    <td><!--<a href="on2"><button type="button2">开启</button></a><a href="off2"><button type="button5">关闭</button></a>-->-</td>
                </tr>
            </tbody>
        </table>
    </div>
</body>

215_1.png

1.使用OpenSSL来为自己签发证书

#1 生成私钥
root@one:~/nodejs/CA# openssl genrsa 1024 > /pathway/private.pem
-bash: /pathway/private.pem: No such file or directory
root@orangepione:~/nodejs/CA# openssl genrsa 1024 > private.pem
Generating RSA private key, 1024 bit long modulus
..++++++
...............++++++
e is 65537 (0x10001)
#2 生成签发请求
root@one:~/nodejs/CA# openssl req -new -key private.pem -out csr.csr
You are about to be asked to enter information that will be incorporated
into your certificate request.
What you are about to enter is what is called a Distinguished Name or a DN.
There are quite a few fields but you can leave some blank
For some fields there will be a default value,
If you enter '.', the field will be left blank.
-----
Country Name (2 letter code) [AU]:
State or Province Name (full name) [Some-State]:
Locality Name (eg, city) []:
Organization Name (eg, company) [Internet Widgits Pty Ltd]:
Organizational Unit Name (eg, section) []:
Common Name (e.g. server FQDN or YOUR name) []:192.168.3.199
Email Address []:

Please enter the following 'extra' attributes
to be sent with your certificate request
A challenge password []:
An optional company name []:
#3 提交签发
root@one:~/nodejs/CA# openssl x509 -req -days 365 -in csr.csr -signkey private.pem -out ca.crt
Signature ok
subject=/C=AU/ST=Some-State/L=/O=Internet Widgits Pty Ltd/OU=/CN=192.168.3.199
Getting Private key

2.服务端代码

var https = require('https');//引用https模块
var fs = require('fs');

var options = {
    key: fs.readFileSync('./CA/private.pem'),//私钥
    cert: fs.readFileSync('./CA/ca.crt')//证书
};

https.createServer(options,function(req,res){
    res.writeHead(200);//200响应
    res.end('hello world\n');//发送数据
}).listen(443);//监听默认的https端口

3.效果

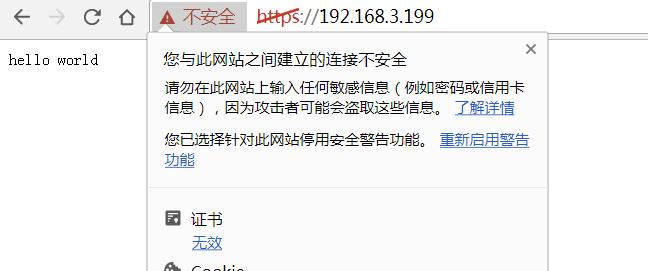
212_1.png

由于是自签名证书,所以游览器显示不安全的连接是正常的。

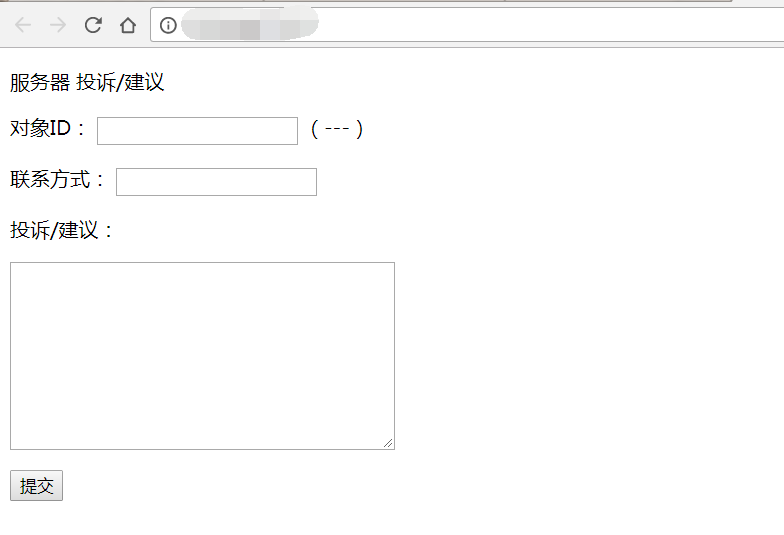
学习了Nodejs的Post后写的一个非常简易的留言板。

一共三个文件:main.js(主程序),index.html(页面模板),input.txt(留言内容)。

var http = require('http');
var fs = require("fs");
var querystring = require('querystring');
http.createServer(function (req, res) {
    var post = '';
    req.on('data',function(chunk){
    post += chunk;//接收来自游览器的Post信息
    console.log(chunk);
    })
    req.on('end',function(){
        post = querystring.parse(post);//Post数据转换
        console.log('post:',post);
        res.writeHead(200, {'Content-Type': 'text/html; charset=utf8'});//请求头,一定要加,否则游览器访问会变成下载这个网页
        var data = fs.readFileSync('index.html');//同步读取
        if(post.id && post.user && post.text){//判断数据是否为空
            if(input(post.id,post.user,post.text) != -1){//判断报错
                res.write('感谢反馈!');
            }else{
                res.write('ERROR');
            }
        }else{
            res.write(data.toString());//返回表单
        }
        res.end();
    });
}).listen(80);
function input(id,user,text){
    var data = fs.readFileSync('input.txt');//同步读取
    data += JSON.stringify({'id':id,'user':user,'text':text});//以JSON的方式存储信息,input.txt必须存在,否则报错
    data += '\n';
    fs.writeFile('input.txt',data,{flag:'w',encoding:'utf-8',mode:'0666'},function(err){
     if(err){
         return -1;
     }});
}

175-1.png

初学Nodejs的练手之作,可能有细节处理不好。

代码还是比较简单的,用了oshttp模块,返回json数据。

var http = require('http');//引用模块
var os = require('os');
var netdev = "wlan0";//网卡名
http.createServer(function (req, res) {
    var net = os.networkInterfaces();
    res.writeHead(200, {'Content-Type': 'application/json'});//Http响应头
    res.write("["+JSON.stringify({//生成json数据
        hostname:os.hostname(),
        platform:os.arch()+"-"+os.platform()+os.release(),
        uptime:os.uptime().toFixed(0),//系统运行时间取整
        load:os.loadavg(),
        totalram:(os.totalmem()/1024).toFixed(0),
        freeram:(os.freemem()/1024).toFixed(0),
    }));
    //网卡信息
    res.end(","+JSON.stringify({//生成json数据
        address:net[netdev][0]["address"],
        family:net[netdev][0]["family"],
        internal:net[netdev][0]["internal"]
    })+"]");
}).listen(80);//监听端口
console.log('Server running at http://192.168.3.184');


84-3.png