标签 Java 下的文章

???

帮别人提出的解决方案(吹B过头),临时突击翻文档学移动开发写的,虽然没有多少行。

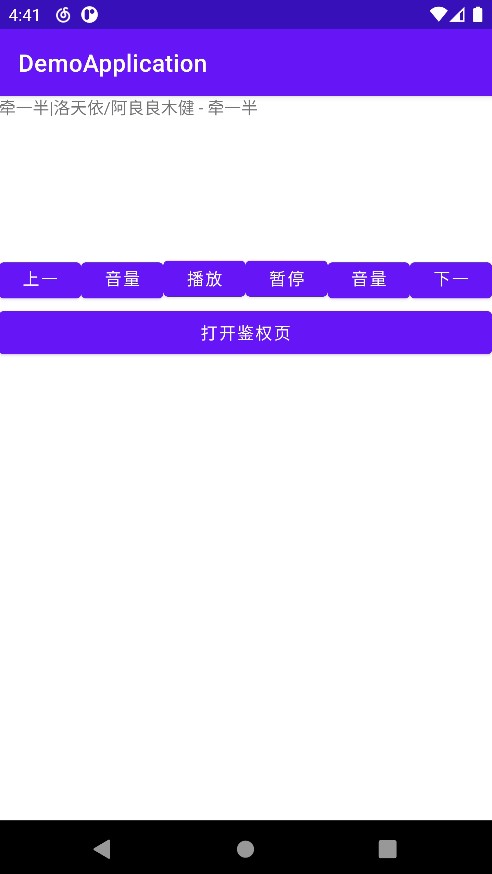
得到歌曲名与作者

这里用到了监听器,得到通知栏的网易云的播放控件,读取歌曲名与作者。

来点权限:

<service android:name=".NotificationListener"
        android:label="DemoApp"
        android:permission="android.permission.BIND_NOTIFICATION_LISTENER_SERVICE">
        <intent-filter>
            <action android:name="android.service.notification.NotificationListenerService" />
        </intent-filter>
        <meta-data
            android:name="android.service.notification.default_filter_types"
            android:value="1,2">
        </meta-data>
        <meta-data
            android:name="android.service.notification.disabled_filter_types"
            android:value="2">
        </meta-data>
</service>

监听器类:

package com.test.demoapplication;

import android.app.Notification;
import android.content.Intent;
import android.os.Bundle;
import android.service.notification.NotificationListenerService;
import android.service.notification.StatusBarNotification;
import android.util.Log;
import android.view.ViewGroup;
import android.widget.TextView;

public class NotificationListener extends NotificationListenerService {
    @Override
    public void onNotificationPosted(StatusBarNotification sbn) {
        //网易云
        if(!sbn.getPackageName().equals("com.netease.cloudmusic")) return;

        //去除一般性通知
        if(!sbn.getNotification().extras.getString(Notification.EXTRA_TEXT,"").equals("")) return;

        //取得通知栏组件
        //另: 网易云支持安卓的MediaBroswerService,这个以后再说
        ViewGroup view = (ViewGroup) sbn.getNotification().bigContentView.apply(this, null);

        String author = (String) ((TextView) (((ViewGroup) view.getChildAt(2))).getChildAt(1)).getText();
        String songName = (String) ((TextView) (((ViewGroup) view.getChildAt(2))).getChildAt(0)).getText();

        Log.i("Debug",songName + "|" + author);

        super.onNotificationPosted(sbn);
    }

    @Override
    public void onNotificationRemoved(StatusBarNotification sbn) {
        if(!sbn.getPackageName().equals("com.netease.cloudmusic")) return;
        super.onNotificationRemoved(sbn);
    }
}

控制音乐播放

这个用模拟按键来实现,是通用的,不过要注意开启线控。

//模拟按键要在线程中执行,否则会卡死
class UPressKey extends Thread {
    private int keyCode;
    public UPressKey(int keyCode) {
        this.keyCode = keyCode;
    }

    @Override
    public void run() {
        Instrumentation mInst = new Instrumentation();
        mInst.sendKeyDownUpSync(this.keyCode);
    }
}


//以下为控制按键
new UPressKey(KeyEvent.KEYCODE_MEDIA_PREVIOUS).start();
new UPressKey(KeyEvent.KEYCODE_VOLUME_UP).start();
new UPressKey(KeyEvent.KEYCODE_MEDIA_PLAY).start();
new UPressKey(KeyEvent.KEYCODE_VOLUME_DOWN).start();
new UPressKey(KeyEvent.KEYCODE_MEDIA_NEXT).start();
new UPressKey(KeyEvent.KEYCODE_MEDIA_PAUSE).start();

实现
24 185911.jpg

如题,玩了这么久Minecraft,开了那么多服,总该要会写服务器插件吧。

环境部署

JDK要求1.8,IDE随意,另外还要有Spigot的服务端,将服务端以库的形式导入到IDE即可。
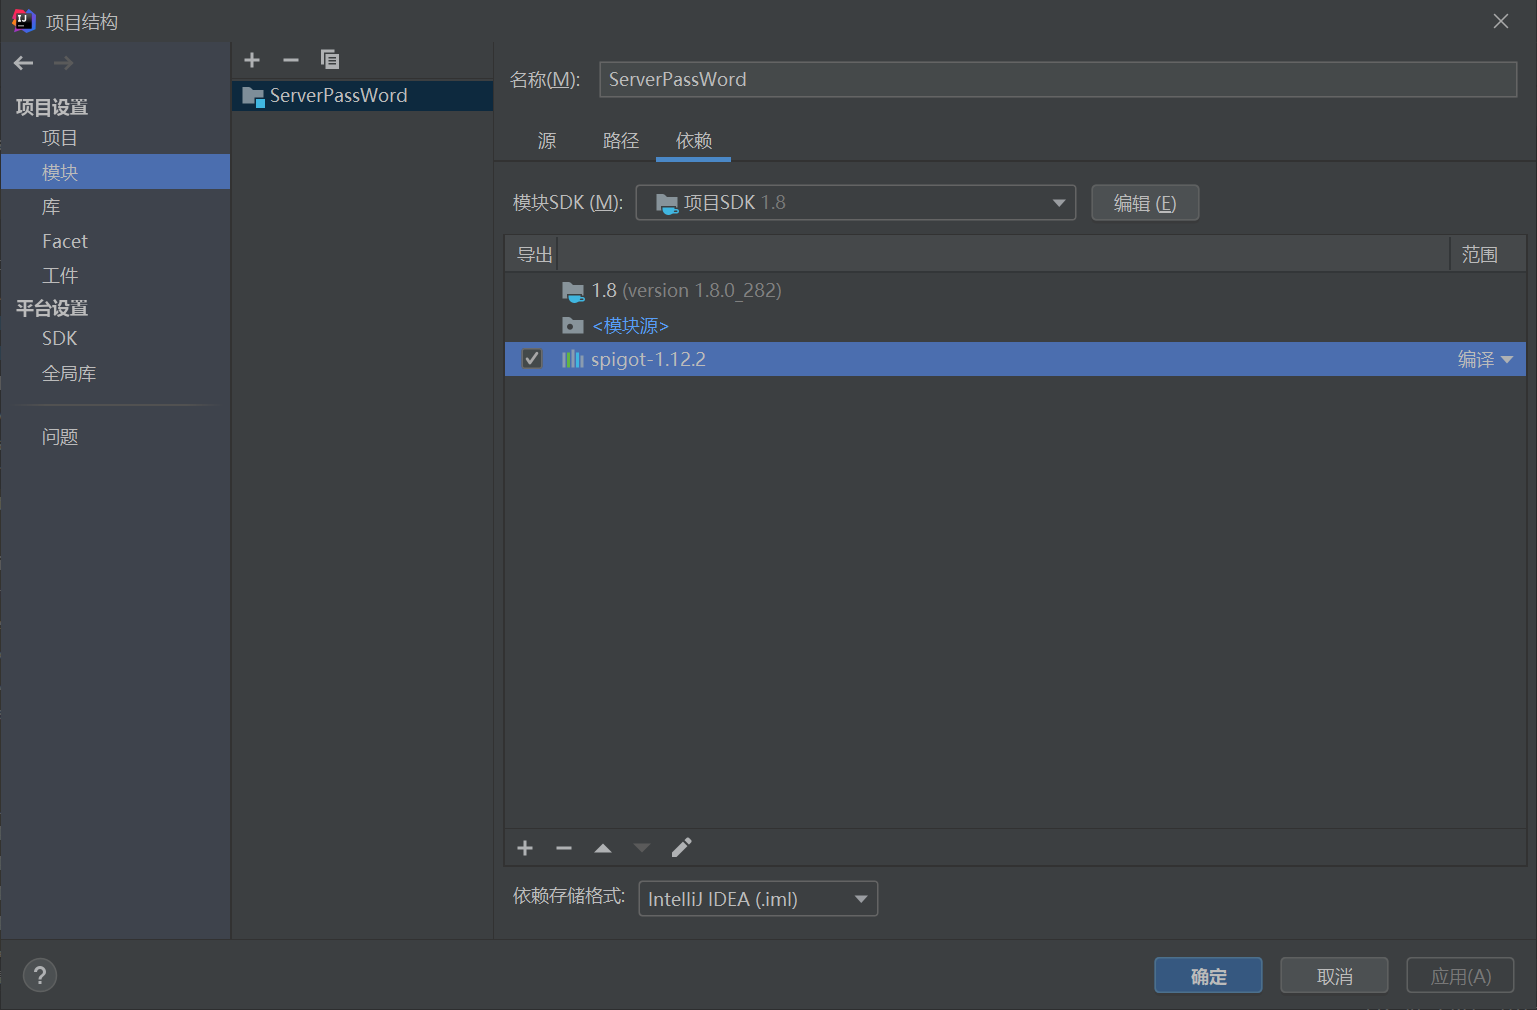
比方说IDEA:文件 > 项目结构 > 项目设置 > 模块 来导入,导入后勾选导出选项。
13160207.png

入口类

现在我们随意取个名字,新建个类:

package com.yeziruo.mc.test;

import org.bukkit.plugin.java.JavaPlugin;

public class MainClass extends JavaPlugin {
    //服务器开启时执行
    public void onEnable() {
        super.onEnable();
    }

    //服务器关闭时执行
    public void onDisable() {
        super.onDisable();
    }
}

接着新建一个叫plugin.yml的文件,填写如下内容:

//名称,入口点,版本(打包时请删除本行说明)
name: Test
main: com.yeziruo.mc.test.MainClass
version: 0.0.1

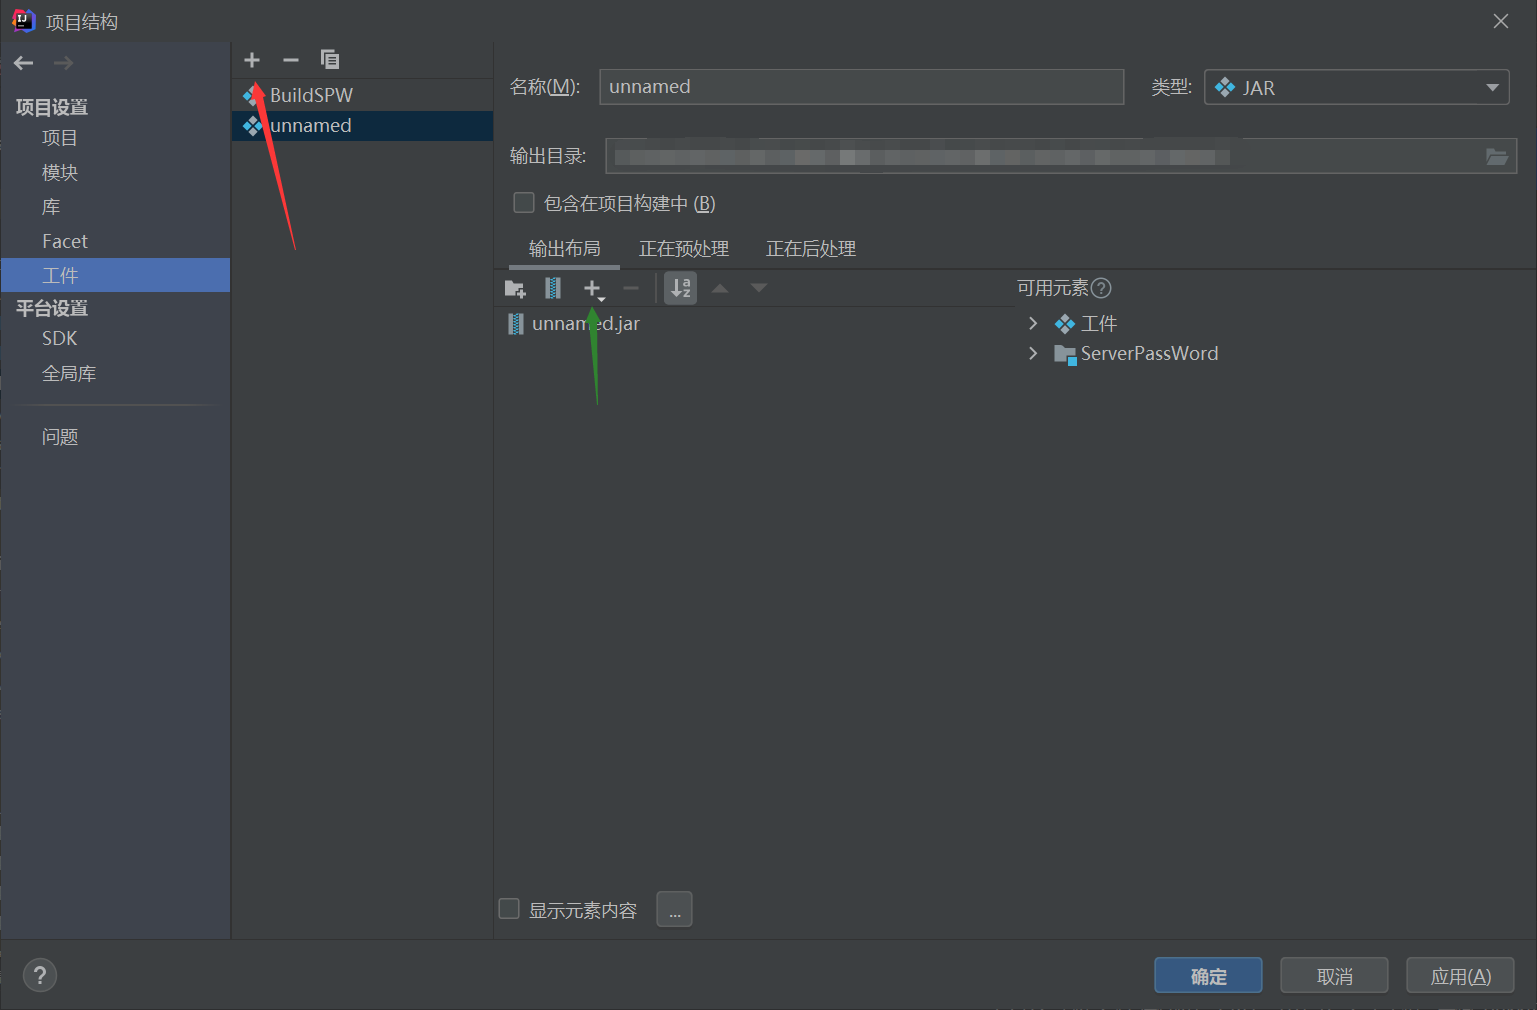
接着打包,不同IDE方式不同,以IDEA为例:文件 > 项目结构 > 项目设置 > 工件 里添加。
13161101.png
并点击绿色箭头的加号,添加模块输出与plugin.yml文件,之后点击构建菜单下的构建工件,等打包完成后扔进服务端测试即可。

监听器

上面的例子只会在控制台有有一行输出罢了,下面我们做一个简单的欢迎插件,当玩家进入服务器后向其发送欢迎信息。
新建一个类,名称随意。

package com.yeziruo.mc.test;

//颜色
import org.bukkit.ChatColor;
//玩家对象
import org.bukkit.entity.Player;
//监听器头
import org.bukkit.event.EventHandler;
import org.bukkit.event.Listener;
//玩家加入事件
import org.bukkit.event.player.PlayerJoinEvent;

public class Welcome implements Listener {
    @EventHandler
    //on加监听器名去Event
    //监听器均在org.bukkit.event下,具体用法请翻阅文档
    public void onPlayerJoin(PlayerJoinEvent event) {
        Player player = event.getPlayer();
        player.sendMessage(ChatColor.GREEN + "欢迎加入," + player.getName() + "!");
    }
}

回到入口类,在onEnable中添加一行:

this.getServer().getPluginManager().registerEvents(new Welcome(), this);

第一个个命令

同样新建一个类,名称随意。

package com.yeziruo.mc.test;

import org.bukkit.ChatColor;
import org.bukkit.command.Command;
import org.bukkit.command.CommandExecutor;
import org.bukkit.command.CommandSender;
import org.bukkit.entity.Player;

public class PlayerCommand implements CommandExecutor {
    public boolean onCommand(CommandSender commandSender, Command command, String s, String[] strings) {
        //commandSender 执行实体(比方说玩家) strings 参数
        //if(strings.length == 0) return false;
        commandSender.sendMessage("PONG!");
        //成功执行返回true,否则返回false
        return true;
    }
}

当然,同样要注册命令,首先在plugin.yml下面添加:

//记得删除注释
commands:
  //命令名
  ping:
    //介绍
    description: Return PONG!
    //用法
    usage: /ping

然后又回到入口类,在onEnable中添加一行:

//命令节点名与执行类
this.getCommand("ping").setExecutor(new PlayerCommand());

同样打包,在服务器中输入/ping即可看到回复。

最后

SpigotMC JavaDoc:
https://hub.spigotmc.org/javadocs/spigot/index.html

如果要实时计算或产生效果,可以建个线程来跑。

摸了!
博客现在在缓慢更新中,没有嗝屁!

适用于Ubuntu/Debian

1.添加源

deb http://ppa.launchpad.net/webupd8team/java/ubuntu trusty main
deb-src http://ppa.launchpad.net/webupd8team/java/ubuntu trusty main

系统版本列表:

http://ppa.launchpad.net/webupd8team/java/ubuntu/dists/

2.导入GPG key到系统验证包的合法性

sudo apt-get install software-properties-common dirmngr
sudo apt-key adv --keyserver keyserver.ubuntu.com --recv-keys EEA14886

3.更新索引与安装

sudo apt-get update && sudo apt-get install oracle-java8-installer

4.完成

java -version

5.设为默认java环境

sudo apt-get install oracle-java8-set-default