2017年11月

我的服务器是 Debian 8,不同的Linux发行版有一定差异。

1 下面我们来安装Nginx。

1.一条命令解决

root@Server:~# sudo apt-get install nginx -y

2.查看版本

root@Server:~# nginx -v
nginx version: nginx/1.6.2

现在可以访问你的站点了:

231-1.png

2 Nginx安装好后,我们接下来安装PHP。

1.又一条命令解决

root@Server:~# apt-get install php5-fpm -y

至于扩展以后再装

3 Nginx PHP的配置

Nginx需要配置才能支持PHP,我们这里是使用PHP-fpm方式。

对PHP的配置:

1.打开PHP-fpm配置文件
nano /etc/php5/fpm/php.ini
(or vim /etc/php5/fpm/php.ini)
2.找到 ;cgi.fix_pathinfo=1 一行,去掉分号(;),将1改成0,即:
cgi.fix_pathinfo=0
3.保存退出

对Nginx的配置:

1.打开Nginx的配置文件

root@Server:/etc/nginx/sites-enabled# nano /etc/nginx/sites-enabled/default

2.找到如下:

# Add index.php to the list if you are using PHP
index index.html index.htm index.nginx-debian.html index.php;(添加index.php)

#location ~ \.php$ {(删除这行的#号)
#       include snippets/fastcgi-php.conf;(删除这行的#号)
#
#       # With php5-cgi alone:
#       fastcgi_pass 127.0.0.1:9000;
#       # With php5-fpm:
#       fastcgi_pass unix:/var/run/php5-fpm.sock;(删除这行的#号)
#}(删除这行的#号)

3.保存,检查配置:

root@Server:~# nginx -t
nginx: the configuration file /etc/nginx/nginx.conf syntax is ok
nginx: configuration file /etc/nginx/nginx.conf test is successful

4.重启

root@Server:~# nginx -s reload

5.新建一个PHP文件测试:

root@Server:~# nano /var/www/html/info.php
(or vim /var/www/html/info.php)
内容:
    <?php phpinfo()?>

6.访问,测试是否正常显示:
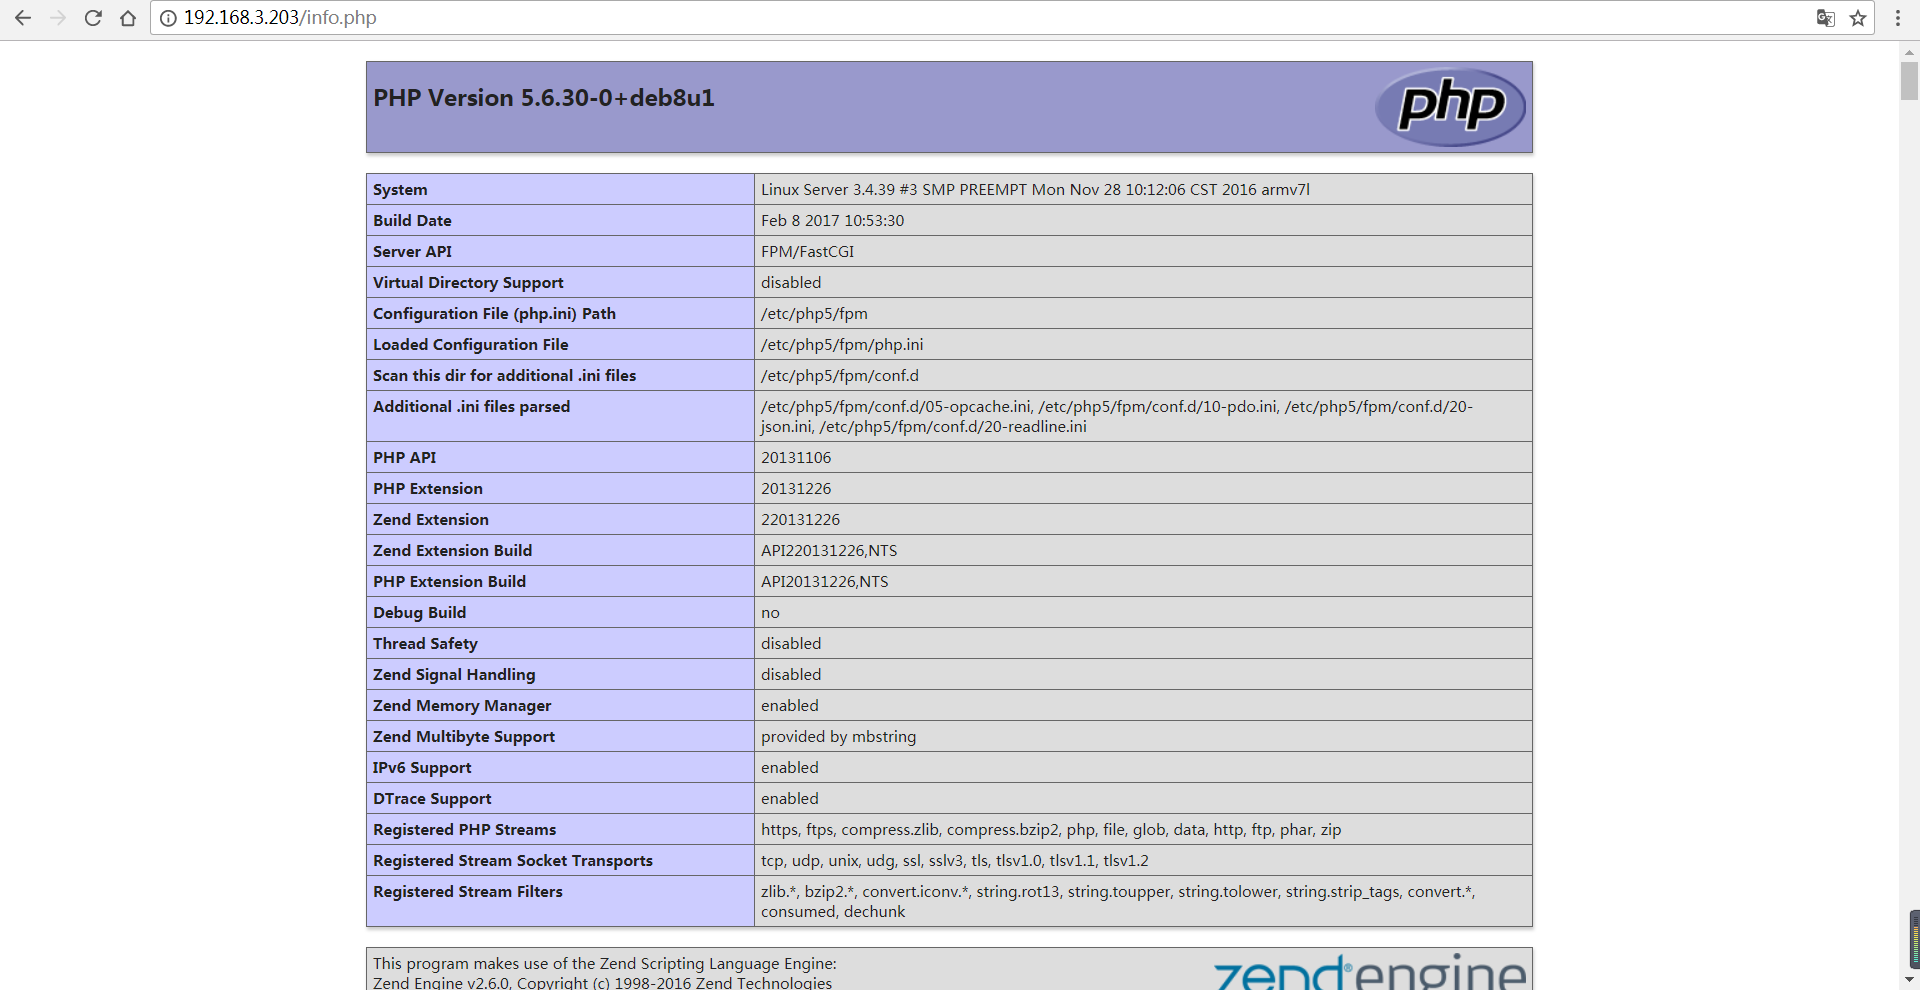
231-3.png

配置完成,可以正常使用PHP了。

本文选取常用的Web Servre做对比,并选择其中一个来作为示例来写后面的建站文章。

目前常用的有LAMP,LNMP,LLMP这三个建站的服务器软件。

L 代表 Linux,如果使用Windows建站可以关文章了
A/N/L 代表 Apache2/Nginx/Lighttpd,Web Servre
M 代表 MySQL,一种数据库(还有比较轻量化的数据库:SQLite,但支持他的应用比较少)
P 代表 PHP,一种脚本语言

Apache2

Apache HTTP Server(简称Apache)是Apache软件基金会的一个开放源码的网页服务器,可以在大多数计算机操作系统中运行,由于其多平台和安全性被广泛使用,是最流行的Web服务器端软件之一。它快速、可靠并且可通过简单的API扩展,将Perl/Python等解释器编译到服务器中。
Apache HTTP服务器是一个模块化的服务器,源于NCSAhttpd服务器,经过多次修改,成为世界使用排名第一的Web服务器软件。
它可以运行在几乎所有广泛使用的计算机平台上。

内存占用较大,不适合小型服务器,在实际使用中会比较卡,再加上MySQL.....;但配置简单,无需配置就能使用PHP,适合于访问量大的大型站点。

Nginx

Nginx (engine x) 是一个高性能的HTTP和反向代理服务器,也是一个IMAP/POP3/SMTP服务器。Nginx是由伊戈尔·赛索耶夫为俄罗斯访问量第二的Rambler.ru站点(俄文:Рамблер)开发的,第一个公开版本0.1.0发布于2004年10月4日。
其将源代码以类BSD许可证的形式发布,因它的稳定性、丰富的功能集、示例配置文件和低系统资源的消耗而闻名。2011年6月1日,nginx 1.0.4发布。
Nginx是一款轻量级的Web 服务器/反向代理服务器及电子邮件(IMAP/POP3)代理服务器,并在一个BSD-like 协议下发行。其特点是占有内存少,并发能力强,事实上nginx的并发能力确实在同类型的网页服务器中表现较好,中国大陆使用nginx网站用户有:百度、京东、新浪、网易、腾讯、淘宝等。

轻量化,内存开销还是比较小的,并发能力强;但配置有点繁琐,懒人还是去用Apache2吧。

Lighttpd

Lighttpd 是一个德国人领导的开源Web服务器软件,其根本的目的是提供一个专门针对高性能网站,安全、快速、兼容性好并且灵活的web server环境。具有非常低的内存开销、cpu占用率低、效能好以及丰富的模块等特点。

目前资料较少,不过还不错,轻量化,内存开销小。

至于安装哪个好呢?

要省内存的话LNMP是最好的选择。
静态的多用LNMP还是不错的。
动态内容多的话,LAMP还是最稳定的。
至于LLMP,自己可以去尝试一下。

这里我们选取Nginx来作为示例来在Linux下来搭建站点。

用于简单演示JS的AJAX,使用Nodejs做服务端。

1.服务端源码(与这篇文章一样)

var http = require('http');//引用模块
var os = require('os');
var netdev = "wlan0";//网卡名
http.createServer(function (req, res) {
    var net = os.networkInterfaces();
    res.writeHead(200, {'Content-Type': 'application/json'});//Http响应头
    res.write("["+JSON.stringify({//生成json数据
        hostname:os.hostname(),
        platform:os.arch()+"-"+os.platform()+os.release(),
        uptime:os.uptime().toFixed(0),//系统运行时间取整
        load:os.loadavg(),
        totalram:(os.totalmem()/1024).toFixed(0),
        freeram:(os.freemem()/1024).toFixed(0),
    }));
    //网卡信息
    res.end(","+JSON.stringify({//生成json数据
        address:net[netdev][0]["address"],
        family:net[netdev][0]["family"],
        internal:net[netdev][0]["internal"]
    })+"]");
}).listen(80);//监听端口
console.log('Server running at http://192.168.3.184');

2.HTML源码

<script>
function getinfo(){
    http=new XMLHttpRequest(); //AJAX
    http.onreadystatechange=function() {
        if (http.readyState==4){
            if(http.status==200){
                var info = JSON.parse(http.responseText); //转换为JSON对象
                document.getElementById("ram").innerHTML=(info['freeram']/1024).toFixed(0)+'\/'+(info['totalram']/1024).toFixed(0)+"MB";
                document.getElementById("time").innerHTML=(info["uptime"]/60).toFixed(2)+'min';
                setInterval(function(){getinfo();},1500); //定时刷新(1.5s)
        }}}
    http.open("GET","/get",true); //连接
    http.send(null);
}
</script>
<body onload = getinfo()>
    <div align="center" id="l">设备信息</div>
    <div align="center">
        <table width="46%" id="tb">
            <tbody>
                <tr>
                    <th width="33%">设备</th>
                    <th width="34%">值</th>
                    <th width="33%">操作</th>
                </tr>
                <tr bgcolor="#FFFFFF">
                    <td>内存</td>
                    <td id='ram'>ram.value</td>
                    <td><!--<a href="on1"><button type="button1">开启</button></a><a href="off1"><button type="button4">关闭</button></a>-->-</td>
                </tr>
                <tr bgcolor="#FFFFFF">
                    <td>运行时间</td>
                    <td id='time'>time.value</td>
                    <td><!--<a href="on2"><button type="button2">开启</button></a><a href="off2"><button type="button5">关闭</button></a>-->-</td>
                </tr>
            </tbody>
        </table>
    </div>
</body>

215_1.png

1.使用OpenSSL来为自己签发证书

#1 生成私钥
root@one:~/nodejs/CA# openssl genrsa 1024 > /pathway/private.pem
-bash: /pathway/private.pem: No such file or directory
root@orangepione:~/nodejs/CA# openssl genrsa 1024 > private.pem
Generating RSA private key, 1024 bit long modulus
..++++++
...............++++++
e is 65537 (0x10001)
#2 生成签发请求
root@one:~/nodejs/CA# openssl req -new -key private.pem -out csr.csr
You are about to be asked to enter information that will be incorporated
into your certificate request.
What you are about to enter is what is called a Distinguished Name or a DN.
There are quite a few fields but you can leave some blank
For some fields there will be a default value,
If you enter '.', the field will be left blank.
-----
Country Name (2 letter code) [AU]:
State or Province Name (full name) [Some-State]:
Locality Name (eg, city) []:
Organization Name (eg, company) [Internet Widgits Pty Ltd]:
Organizational Unit Name (eg, section) []:
Common Name (e.g. server FQDN or YOUR name) []:192.168.3.199
Email Address []:

Please enter the following 'extra' attributes
to be sent with your certificate request
A challenge password []:
An optional company name []:
#3 提交签发
root@one:~/nodejs/CA# openssl x509 -req -days 365 -in csr.csr -signkey private.pem -out ca.crt
Signature ok
subject=/C=AU/ST=Some-State/L=/O=Internet Widgits Pty Ltd/OU=/CN=192.168.3.199
Getting Private key

2.服务端代码

var https = require('https');//引用https模块
var fs = require('fs');

var options = {
    key: fs.readFileSync('./CA/private.pem'),//私钥
    cert: fs.readFileSync('./CA/ca.crt')//证书
};

https.createServer(options,function(req,res){
    res.writeHead(200);//200响应
    res.end('hello world\n');//发送数据
}).listen(443);//监听默认的https端口

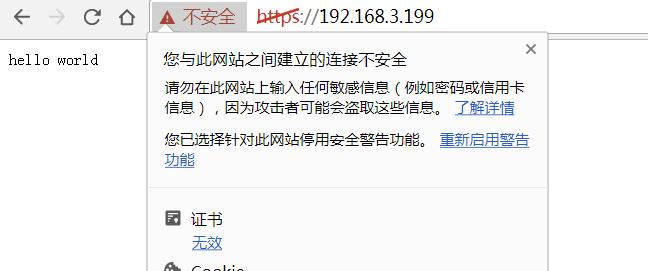
3.效果

212_1.png

由于是自签名证书,所以游览器显示不安全的连接是正常的。